kT LindSAy. Get yours at bighugelabs.com
Showing posts with label Geek Girl. Show all posts

Wednesday, August 12, 2009

It was meant to be all about light

Shame on me, I am 8 months late. Back in December I posted that I wanted to play more with light this year, specifically flashes and studio lighting. It's only now in August that I've purchased my first external flash unit. The Speedlight 430 EXII already looks promising. Just sticking it on auto on my camera has produces some very nice portrait shots, I have to say it does make a lot of difference. As far as the settings on the back go though, am flumoxed, so I bought a book with pictures in it. Eventually I'd like to get a transmitter so I can fire the flash off the camera, and the Blue Peter girl inside me likes the look of these DIY light modifier kits.

First though I'll inspect my picture book! Look out for better lit shots!

Sunday, August 02, 2009

This is not a phone: Photography Applications for the iPhone

The other day I received my shiny new iPhone. The underlying reason for me getting Apple's finest was primarily because my two-year old Nokia N95 had been held together by sellotape for the past six months as the back and battery kept falling out at inappropriate moments and also because I was spending a fortune by being on the internet too much reading emails etc. The iPhone's high contract price was counterbalanced by free web access and there was no clip-on back to fall off! Plus it looked snazzy. I was happy.

But then I came to download a selection of Apps and I discovered that this wasn't really a phone. What it was was another tool I could use to better my photography. The Apple App Store is bulging with photography widgets from filters to create fun photo effects to more serious tools to get your shutter speed spot on. Here's a few I like so far:


Pre-Photoshoot Research

Not a photography app as such but GoogleEarth will easily help you scout locations before a shoot. More specific is FocalWare which promises to be a God-send. It calculates the Sun & Moon location, in relation to due North. This provides an exact means of researching and preparing to photograph a subject with specific lighting or placement of the sun/moon in the scene.

The Photographer's Notebook
Photographers tend to take notes. Often in a small leather bound or occasionally hard backed notebooks recording location data, camera settings used, and other bits and pieces to recreate good shoots or remind of the mistakes made in previous ones. Everytrail (free)is a geotracking application records your movements, takes geotagged photos, to which you can make notes and immediately upload it all to everytrail.com. Originally used as an online tool for travel storytelling, it also offers photographers the chance to take reference photographs, tagged with location data, and record and share the settings that they were taken in. These can all then be plotted on a google map.

Alternatively Photojot is similar to the above but with a nifty sunrise / sunset calculator. It has specific fields to fill in camera settings but doesn't have the sharing facilities as EveryTrail.


Calculators for those complicated things

Can't get your head around manual exposure settings? Use a calculator! ExposureCalc will let you select from a range of different light settings and will give you the different values you need to create a good quality photograph. Photocalc on the other hand is a bit more detailed, providing depth of field (DoF) and hyper-focal distance calculations, exposure reciprocation, and flash exposure calculations. If you want a good all round tool which also tells you when the sun will rise and set then PhotoBuddy is your, er, buddy.

Getting it straight
As in your camera on your tripod (if you are one of those people who don't like to straighten things digitally afterward). Use the iHandy Level Free. It's free, funnily enough.

Photo Editing
If you want to actually use your iPhone as a camera (and it's not a great camera but sometimes it's just easy) you can edit your takes directly on your iphone. There are tonnes of apps for this, but my favorites so far are Tiffen Cool fx, offering nearly 100 different filters which can be applied and saved as “virtual” layers and images are saved out as new files; Lomo and ToyCamera (don't think just shoot); MagicTouch - what it says on the tin, basic retouches such as blemish removal, change eye colour, clone stamp, lighten selective areas etc.

Don't believe you can do much with phone cameras and software. Believe. Check out Tony CeCe's and Greg Schmigel's work, as well as the iPhone Photography Awards.

Tuesday, February 17, 2009

Creating Clone Images

Some people have asked me how I put together "Breathe" - good news, the photo editing work is dead easy (climbing the tree itself...well that's another story)!

Clone pictures are pretty commonplace now on Flickr, there are groups dedicated to them or look at the excellent work of Miss Anelia. I guess you could say they are symbolic of the multiplicity of the self....I just happen to think they are quite fun! This isn't the first one I've made, but I prefer this one.

There are many ways I imagine that you could create one (more tutorials at the bottom) but here's how I did it:

1. Find a tree (preferably one you can get up and that isn't blowing in the wind too much).
2. Set the camera up on a tripod - I had mine on programme setting stopped down a notch, nothing too difficult here.
3. Climb tree
4. Either with the aid of a trusty other or a handheld remote take loads of pictures (I mean loads - I took about 150) of you in different positions (being careful not to fall out of said tree). The trick is not to move the camera a mm! Keep it set on the tripod. Be careful though, if someone comes up and nicks your equiptment you are not in a very good position to go after them in hot pursuit!
5. In photoshop choose one picture to use as a base image, then using the lasso tool select yourselves on the other images and paste them into position, each on a new layer on the base image. Works better if you feather the selection for each.
6. Use the eraser and blur tools to go around the edges and neaten up.
7. Flatten layers
8. I then used the Orton method on this image and played with the tone mapping and curves to create the 'look'.

...In total about 2.5 hours work, voila! Piece of Pie!

[The reflection in the pond was created by copying part of the image, flipping it round, distorting it horizontally using the lens distort filter, pasting into position and decreasing the opacity]

Oh did I mention I have a new website...http://www.ktlindsayphotography.smugmug.com

Other Tutorials
How to make clone pictures using Gimp

Sunday, February 15, 2009

New Web Site!!!!


I now have a website!! http://ktlindsayphotography.smugmug.com. This is my portfolio and a place to put specific projects I have worked on, there are password protected galleries for the commissions I get (and it also has an online store!)

This photo is in honour of my new website and is called "Breathe".

Tuesday, February 10, 2009

Annoyed

It really pisses me off when I comment on a photograph on Flickr asking how the photographer achieved so-and-so effect and they just say 'it's magic' or 'it's a secret'. I mean it's not like without enough googling I couldn't find out, it's not rocket science. Stop being so precious and be a bit more friendly - gripe, gripe!

Monday, December 15, 2008

Bad Firefox

I noticed that when I uploaded a recent photo to Flickr that the colours went all funny. They were not as rich or deep as they looked in Photoshop or iPhoto. Turns out that the problem was with Firefox which doesn't yet support colour profiling. I upgraded to Firefox 3, which I read did support this function only to find out that it ships without this support by default...why? Anyway there is a plugin available for Firefox 3, and on installing it all looks much better. However it is annoying that most of those people using Firefox will not be seeing my photographs how I want them to see them.

Here's a nice blog explaining it all by dria.org

Thursday, December 04, 2008

To branch away from Flickr?

It's not a topic I'm happy to raise! I love Flickr, in Flickr I have found a supportive community which supports my views on open content and has provided me with the opportunity to get feedback on my photography which over the past two years has become my art, and a huge part of my self expression, even at times my therapy. Without Flickr I doubt I would ever have returned to art, a subject I gave up long ago because 'it would never get me anywhere in life'. I used to 'do art' with a 3B pencil and a brush, and now I paint with a lens. So let me be clear, I have no intention of leaving Flickr, however the more lean towards trying to make a bit of a profession out of what was initially was a bit of a hobby, the less Flickr can cater towards my needs.

First off, I like the idea of password protected galleries. If I branch into doing some paid for photographic commissions, it is kind of a service I need. Secondly, I've had a few requests for large prints of my work. I don't offer high res photos on Flicker at present, i.e big enough to print more than 6x4. I'm happy for them to be used under the creative commons licence that I presently stick on them (no derivatives and attribution) and splattered across the interweb. But to be hung as an actual piece of 'art' on someone's wall, or printed in a publication, well for that I want some wonga!! So my thoughts lately have been that I would like to find an online service that will let me create showcase galleries and also sell my prints for me at a price I stipulate, and print them, and post them - the moon on a stick basically!

You'd think this would be out there.....think again.

I've ransacked the web and it seems that there are really no UK based websites that offer the moon on a stick. There is Photobox, where I order prints from (and I have generally been pleased with the results), who offer pro galleries that do the above. However, the site is not taking any new pro users until 'the future', and the old interface left a lot to be desired for - to showcase fine art photography the website should really mirror that. But then I came across SmugMug, a US centric photosharing site that offers everything I dream of - it looks amazing, unlimited storage, is totally customisable down to the domain name, offers a sale service and multiple privacy and viewing options, but...is in $. But really does this matter? In the virtual world where space is not an issue? It's not cheap, at $149.55 pa, BUT I think that's not too bad for a high quality virtual hard drive with e-commerce capabilities.

There are many alternatives to Flickr - deviantART, ZOOMR, Fotki, Photobucket, to name just a few, they all cater for different types of user. I'm toying with the idea of setting up accounts on a few to see what happens and having a test run of e-commerce on SmugMug until PhotoBox gets it's finger out...that's if anyone wants to buy anything that is!

Saturday, November 22, 2008

Sunday, September 07, 2008

Composite Photography

I've really been wanting to have a go at a 'levitation' image for a while, mostly influenced by Love Loren and Chrissy White (two amazing teen flickerites), and anitmethod.

Click on image to see bigger of view an alternate Large On Black.

Even though it is so fairy tale like there is a lot of me in this image, sometimes I think it is easier to express yourself through the surreal. I've been reading a lot about arabian fables lately, one in particular, 'The Indian Bird', influenced this, it kind of stuck in my head - the way a good fable is meant to. But other things are in there, but well, take from it what you will!

How did i do that......?
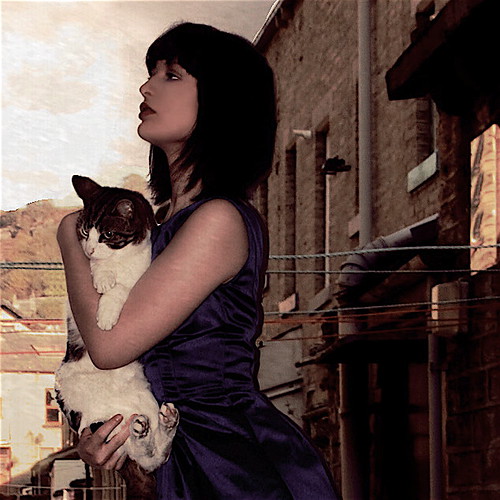
I used four images in total for this - three photographs (the bird, me and the cat, and the street scene), and one texture from Nichol Van. The street scene 'Alley' was found using flickr creative commons and was taken by damien_m_in_japan. The bird is an oldie of mine and the one of me and the cat was taken this morning.

I used photoshop's extract tool to dismember me and the pigeon from the photographs, and then really it was a case of tweaking and refining. I used Michelle Black's 'Even out and contrast' and 'Honey Glaze' as a starting point to bring all the colours together and I twiddled a lot with the layers, curves, selective colour, and also burned and dodged overly contrasty areas. Finally I added the texture (a bit like grey blotting paper) on multiply and that was that. This version is very desaturated, there's a more colourful version on my flickr site with the story to go along with it.

I'm sure that I'll come under quite a bit of criticism for this...it's not 'proper' photography, but sometimes there is more there than what you see through the viewfinder.

Oh, and hope you like the new look blog!

Monday, September 01, 2008

Feeling a bit discomgoogolated?

Feeling stressed or anxious at an inability to access the Internet? You're suffering from "discomgoogolation".

A survey commissioned by information service 118118, the YouGov poll questioned 2,100 Britons. The findings - apparently 44% of Britons suffer from a condition termed 'discomgoogolation' - rising brain activity and blood pressure, i.e. higher stress levels when unable to connect to the Internet. The survey also found that 47% percent of those polled believed the Internet was more important in people's lives than religion, with one in five people paying the Internet more attention than their partner.

I can relate!

Sunday, August 10, 2008

Portrait photography and using actions

I've been asked lately to do a few photoshoots for friends so I thought I should look at bit more into postprocessing portrait type photos. Mostly I've been looking at utilising pre-designed photoshop actions. Actions are simply a series of tasks that you play back on a single file or a batch of files - menu commands, palette options, tool actions, and so on. So rather than spending a age getting the perfect B&W effect you simply load your photo and 'play' an action to do the conversion for you. After the action has been done you can then tweak and adjust the individual layers that it creates to refine the effect to your own taste. The actions I have been using are Michelle Black's basic actions and they are stunning! So photoshoot 1 today with my favorite BaBa Charlotte produced the following types of results:

1. Chocolate BW Tint 2. Modern 3. Vintage Fade 4. Blue BW Tint

1. Epiphany BW 2. Dreamy BW 3. Bon Bon Glaze

1. Michelle's Classic BW 2. Antique 3. Vintage Glaze

Model with photographer (above) has been processed with Michelle's Extreme Bleach Out Glaze action. My favorite few can be seen on my Flickr Stream (thanks for letting me experiment on you Charlotte xxx).

More thoughts on baby photography....
The last few times I've photographed babies they have been very small. With an 8 month old cutie like Charlotte one needs a few more tricks up one's sleave. Peek-a-boo - very effective at getting baby to smile, but pretty difficult if it's just you, enlist the help of someone with a funny face to amuse them unless you are extra good at multitasking. Failing a person, cats are pretty good - babies like cats, just make sure its not in a biting mood. And just make sure they are comfy - I used a big double bed with pillows down the sides. They tend to topple a bit at 8 months!

Wednesday, August 06, 2008

Out take v.2


Not really anything new...this is just a photo that I didnt see from a trailer trash set done back in March. Failing to take anything worth posting I've been learning about action sets this week...abolutely love those produced by Michelle Black - this is her "vintage mode" ontop of my own black and white conversion. On my flicker I've posted a "High Key BW" version - again can't decide which is the best effect! Will try to post something new soon, I have lots of thoughts in my head but having difficulty executing them, mostly cant find the right locations.

Sunday, June 22, 2008

The Orton Method


The Orton Method was invented by Michael Orton using slide film but can be easily replicated in Gimp / Photoshop etc. One image is sharply focused and over exposed ~2 stops. The other is very out of focus and over exposed by ~1 stop. The result adds a really nice dreamlike painterly quality to a photograph.

To play visit this easy tutorial , or a slightly more complex tutorialthat lets you have greater control.

The Orton Flickr Group

Sunday, May 18, 2008

Tune in, Turn off

Simply because it was one of the cheapest accessories I could purchase, I've just bought a polarizing filter (a Hoya Pro1 55m) to go on my kit lens. So, this week I've been playing with filters. The Hoya definitely adds a depth of colour. So I played with this a bit doing some indoor shots (although this is really not what a polarizing filter is best for - think sky and water, however I liked the grittiness it added to the shots). Then I played with photoshop's built in photo filters...so filtering already filtered photographs...and then I ended up converting to B&W so probably all completely pointless!

Here's the b&w version and the colour one is in my flickr account. Out of the two I'm not sure which I like best. As for the subject matter, may be a bit conceptual, but makes sense to me at the moment!

Sunday, April 27, 2008

HDR and Tone Mapping


Inspired by Mysnapz "The Picnic", today me and the 450D discovered how to do auto exposure bracketing (AEB), which basically means taking a series of pictures of the same thing at different exposures. The notion behind this is that you can then blend these photographs together to create what is know as an HDR (High Dynamic Range) photograph, an image that will reflect the range of brightness levels that exist in that particular scene (complete black to white). To merge the photos together you can use photoshop's "Merge to HDR" function or a nice bit of software (free trail available) called Photomatix. Once you have merged into HDR you can play around with "tone mapping" (settings automatically pop up with Photomatix or photoshop tutorial here). This allows you to play with the tonal detail displayed and is really needed to approximate the appearance of HDR images.

The mistakes I made really were with the actual photographs - I only got 3 different exposures as auto bracketing only allows for 3, it is better to have more but as I was doing a self portrait doing it on manual (and running to and fro from the camera to change the setting) was really not an option. Secondly I left autofocus on, this meant the pictures were slightly out of line. Also it's important to set the aperture, because changing aperture (ie having it on auto) also changes depth of field. Basically you want exactly the same photograph many times, all settings the same, apart from the exposure.

The output is the image above. It took a bit more photoshopping than I'd have liked - mostly because the outline of the body was a bit to blurry because of the autofocus. But other than that and adding a slight softfocus and tweaking the tones, it came straight out of the camera (three times). You can see below the progression to the finished image.

Three photographs taken at standard, decreased and increased exposure.


Merged to HDR

Sunday, April 20, 2008

The Canon 450D - the start of a new era

So now I have a grown-up toy, the brand new shiny spanking Canon 450D. I agonised for weeks over what my first DSLR would be, in the end it resulted in a standoff between the Canon and the new Nikon D60 and me bending the ear of the nice young man in Station Cameras for a couple of hours. At the end of the day I went for the pricier canon, for no reason other than it just felt "right" in my hands, had more buttons, and was a bit lighter.

My point and shoot Olympus (God Bless) had much of a DSLR's functionality (minus the lens'of course) and during our two year relationship I learned all about things like aperture, shutter speed, ISO, MF etc etc. However, it stopped hitting the mark about 6 months ago. All those little niggles that go unnoticed during those euphoric beginnings when you are really "into" one another started to grate more and more as time went on. The ISO range was limited, the colour matching sloppy, the f.levels just didn't fulfill expectations, and I grew bored of the way it looked and sounded. My eye started to wonder to other cameras, cameras that were more versatile, more fashionable...cameras that had bigger lens'. The Olympus (God Bless) and me were compatible for a long time, but I changed, I wanted more, and it was finally time to move on.

So now I have a new camera in my life. We are still discovering eachother and we haven't produced anything noteworthy yet but that will come. First impressions - the sharpness, clarity and colour matching are FANTASTIC. The macro function on the camera is OK, but as expected I will need a good macro lens to do anything really close up. It's a tad annoying that I can't alter any of the settings on the pre-set functions (e.g. macro, portrait, landscape), not even the exposure, but I should learn how to do my own settings anyway. It makes a very satisfying "clunk" when I take a picture (and no it's not a fake clunk), and it is much speedier starting up and processing pics. Here are some images straight out of the camera (no photoshopping), nothing special.


Nice DOF on AV


As close as I could get on Macro


Also on macro and on an ISO of 800 as the inside lighting wasn't great. Monochrome setting.


My most fantabulous socks to see how colours come out! Pretty accurate!

Sunday, January 13, 2008

Red Shoes, White Stockings

Lately I've been really enjoying playing with photoshop and learning how to do things "properly" - like converting photos into black and white using the channel mixture and fade to colour commands and playing around with curves, saturation, sponge, burn, dodge, tools. I took this photo today and I'm quite pleased with the "retro" kind of fashion photography look however the original photo had items in it I didn't want so I "tried" to remove them. However my skills at replicating background colours and textures aren't quite there yet (you can see the texture of the wall change if you look closely). Please point me towards a decent tute if you know of one!

---UPDATE---Thank you so much to those at the digital photography school who actually downloaded my phots, weaved magic, gave me excellent instructions.... and voila!! All in the space of a few hours of me posting, fantastic!

Below you can see the original, my post-processed, and postprocessed with the help of the DPS-ers.


Sunday, March 18, 2007

My Avatar, My Self?

avatar - the manifestation of a Hindu deity (especially Vishnu) in human or superhuman or animal form; "the Buddha is considered an avatar of the god Vishnu"

I attended an interesting talk last week by Luciano Floridi entitled “The image, virtual and the real”. Floridi’s focus was “Avatars”, digital beings that are often portrayed as virtual representations of ourselves living online in Metaverses (Stephenson, Snow Crash) such as Second Life and Warcraft. Floridi argues that rather than being ego-polietic (ego=I, Polietic=construction) avatars are a movement away from imaging ourselves towards imagining ourselves; that avatars are not narcissistic representations; they are not an image of ourselves. After all, why exist as yourself in the shitty world you exist in if you can create an alter-ego, build an environment you have always wanted to roam, where you can be who you want to be, carry out your fantasies, and step away from the self? Is the digital age signalling a time when we are no longer obsessed with representing ourselves online and actually make a conscious move to disassociate with ourselves in the virtual world?

At an extreme it is almost possible to eliminate your own manifestation (users who reduce their avatars to 1 pixel and name’s as one character, almost invisible). However, I see avatars as something like having a controllable multiple personality, although users are not always fully conscious of exactly what they are expressing about their personality via their avatars. It's the same for the dreamer. Every visual element in the dream may be a representation of some aspect of the dreamer's identity. Each character and object in the dream is a split off or dissociated component of the self - but the dreamer is not fully aware of this. In the Metaverse we can be shape-shifters, omnipotent, express and experiment with various aspects of identity that we could not do in the “real world”. The avatar question is not about who we are but who we can be.

Tuesday, March 13, 2007

Doing the mash

Yesterday I went to a talk on "mashups". Mashing, in techy speak, is when content from more than one source is combined into an integral experience, so for instance feeding in flickr photos or an rss feed into blogger or another website. Fd's flicker toys, which I'm always blogging about, also "mash" as they use the Flickr API to feed in photos and search flickr to create snazzy photo art or perform other functions. Flickr seems to be one of the "in" things to mash at the moment and funky little programs are cropping up all over the place. For instance tagnautica is a browser that allows users to explore the huge flickr image collection by using tags as keywords to classify images, meanwhile the retrievr sketching search engine is an impressive gizmo that allows users to search and explore Flickr images by drawing rough sketches.

Mashing creates many possibilites - we can extract certain types of data from a database such as < date > or < location > and create timelines of events or place markers onto a map (see google maps). Mashups, as of today, are mostly a programmer's affair although there are some tools such as MapBuilder that can help you create basic maps without coding. I'm going to give it a shot though, it's very "in" in the world of Web 2.0 (if you believe in that kind of thing Mr Berners Lee).

Further Info
The Programmable Web
Information Aesthetics